Mass upload
Mass upload is a common process for different type of data. Mass upload is available for:
The current documentation provides example for Outbound Order upload.
Click on the Upload button to access the feature: 
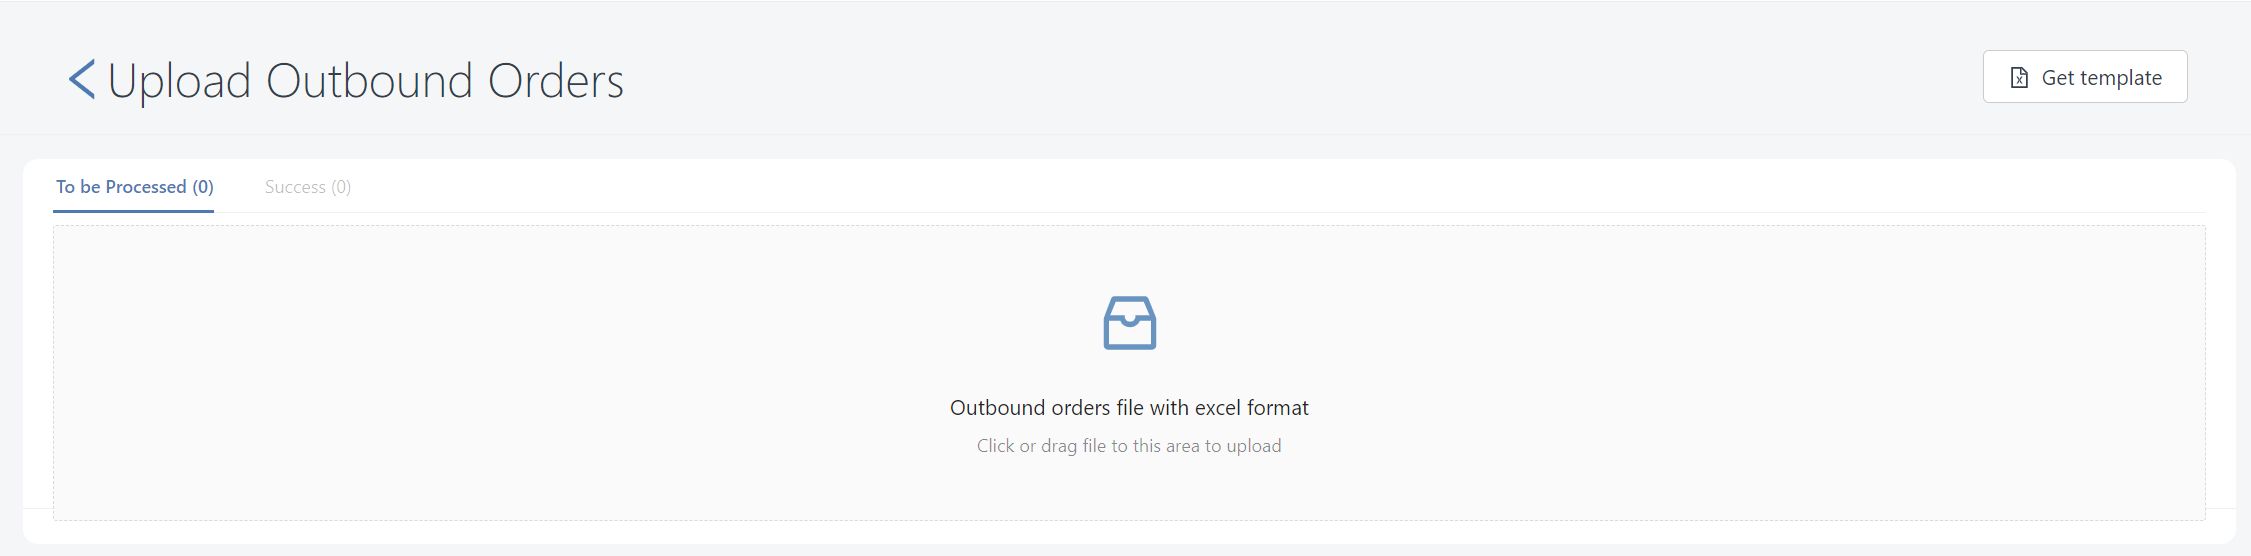
You will then land on the upload Excel page:
Templates
Download Excel template
The current template can be downloaded by clicking the Get template button: 
Default template
If no template is defined, the default template will be used. Please refer to the below docs about default templates:
Default templates are very simple, and are based on the minimum fields which are mandatory for data creation: therefore. Any customized template should at least have these fields.
Customized template
The template fields can be customized according to your business needs, and they can be defined as mandatory if necessary. Plese contact your system account administrator if you wish to modify the template.
Version control
In order to avoid input mistakes by using an old version of the template, or using another template, a template version control can be implemented.
In that case, Hubble will verify:
- the template name
- the template version
If the wrong template is uploaded, the below message would be displayed:
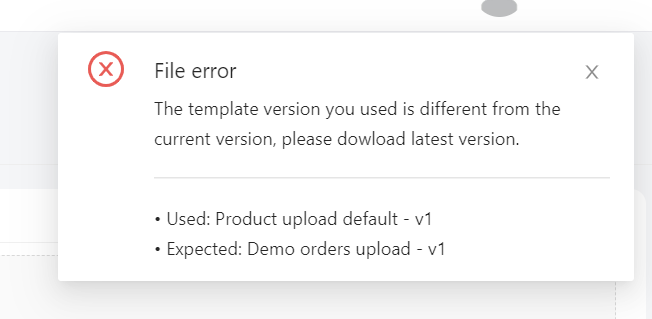
Template version control is optional and can be disabled.
Excel file's data
The file must be an Excel file with xlsx extension.
The Excel file might have some pivot data to make the difference between different levels, for example order header (level 1) and order lines (level 2). In that case, the level 1 (order header) information should be repeated for each line (order line, level 2), as per below example:
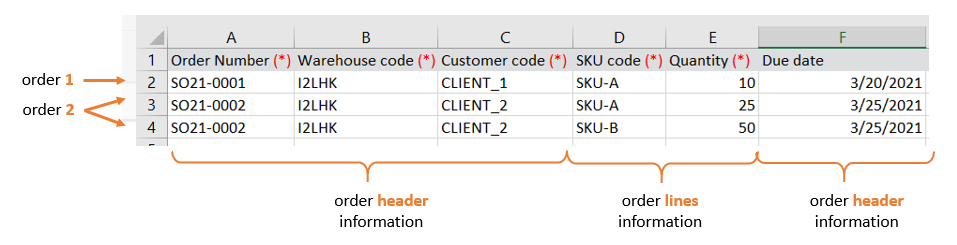
File reading is based on column number. In the above example, whatever the column name, the SKU code would be read from column E. It is therefore not possible to switch columns except if they are reconfigured in the template first.
For a smooth integration, the cell type should match the data type:
- For dates, it should abe displayed as a date in Excel to avoid confusion on month and day
- For number (whatever integer or decimal), it should appear as a number in Excel, to avoid sending characters to a numeric field
Upload process
Upload the file
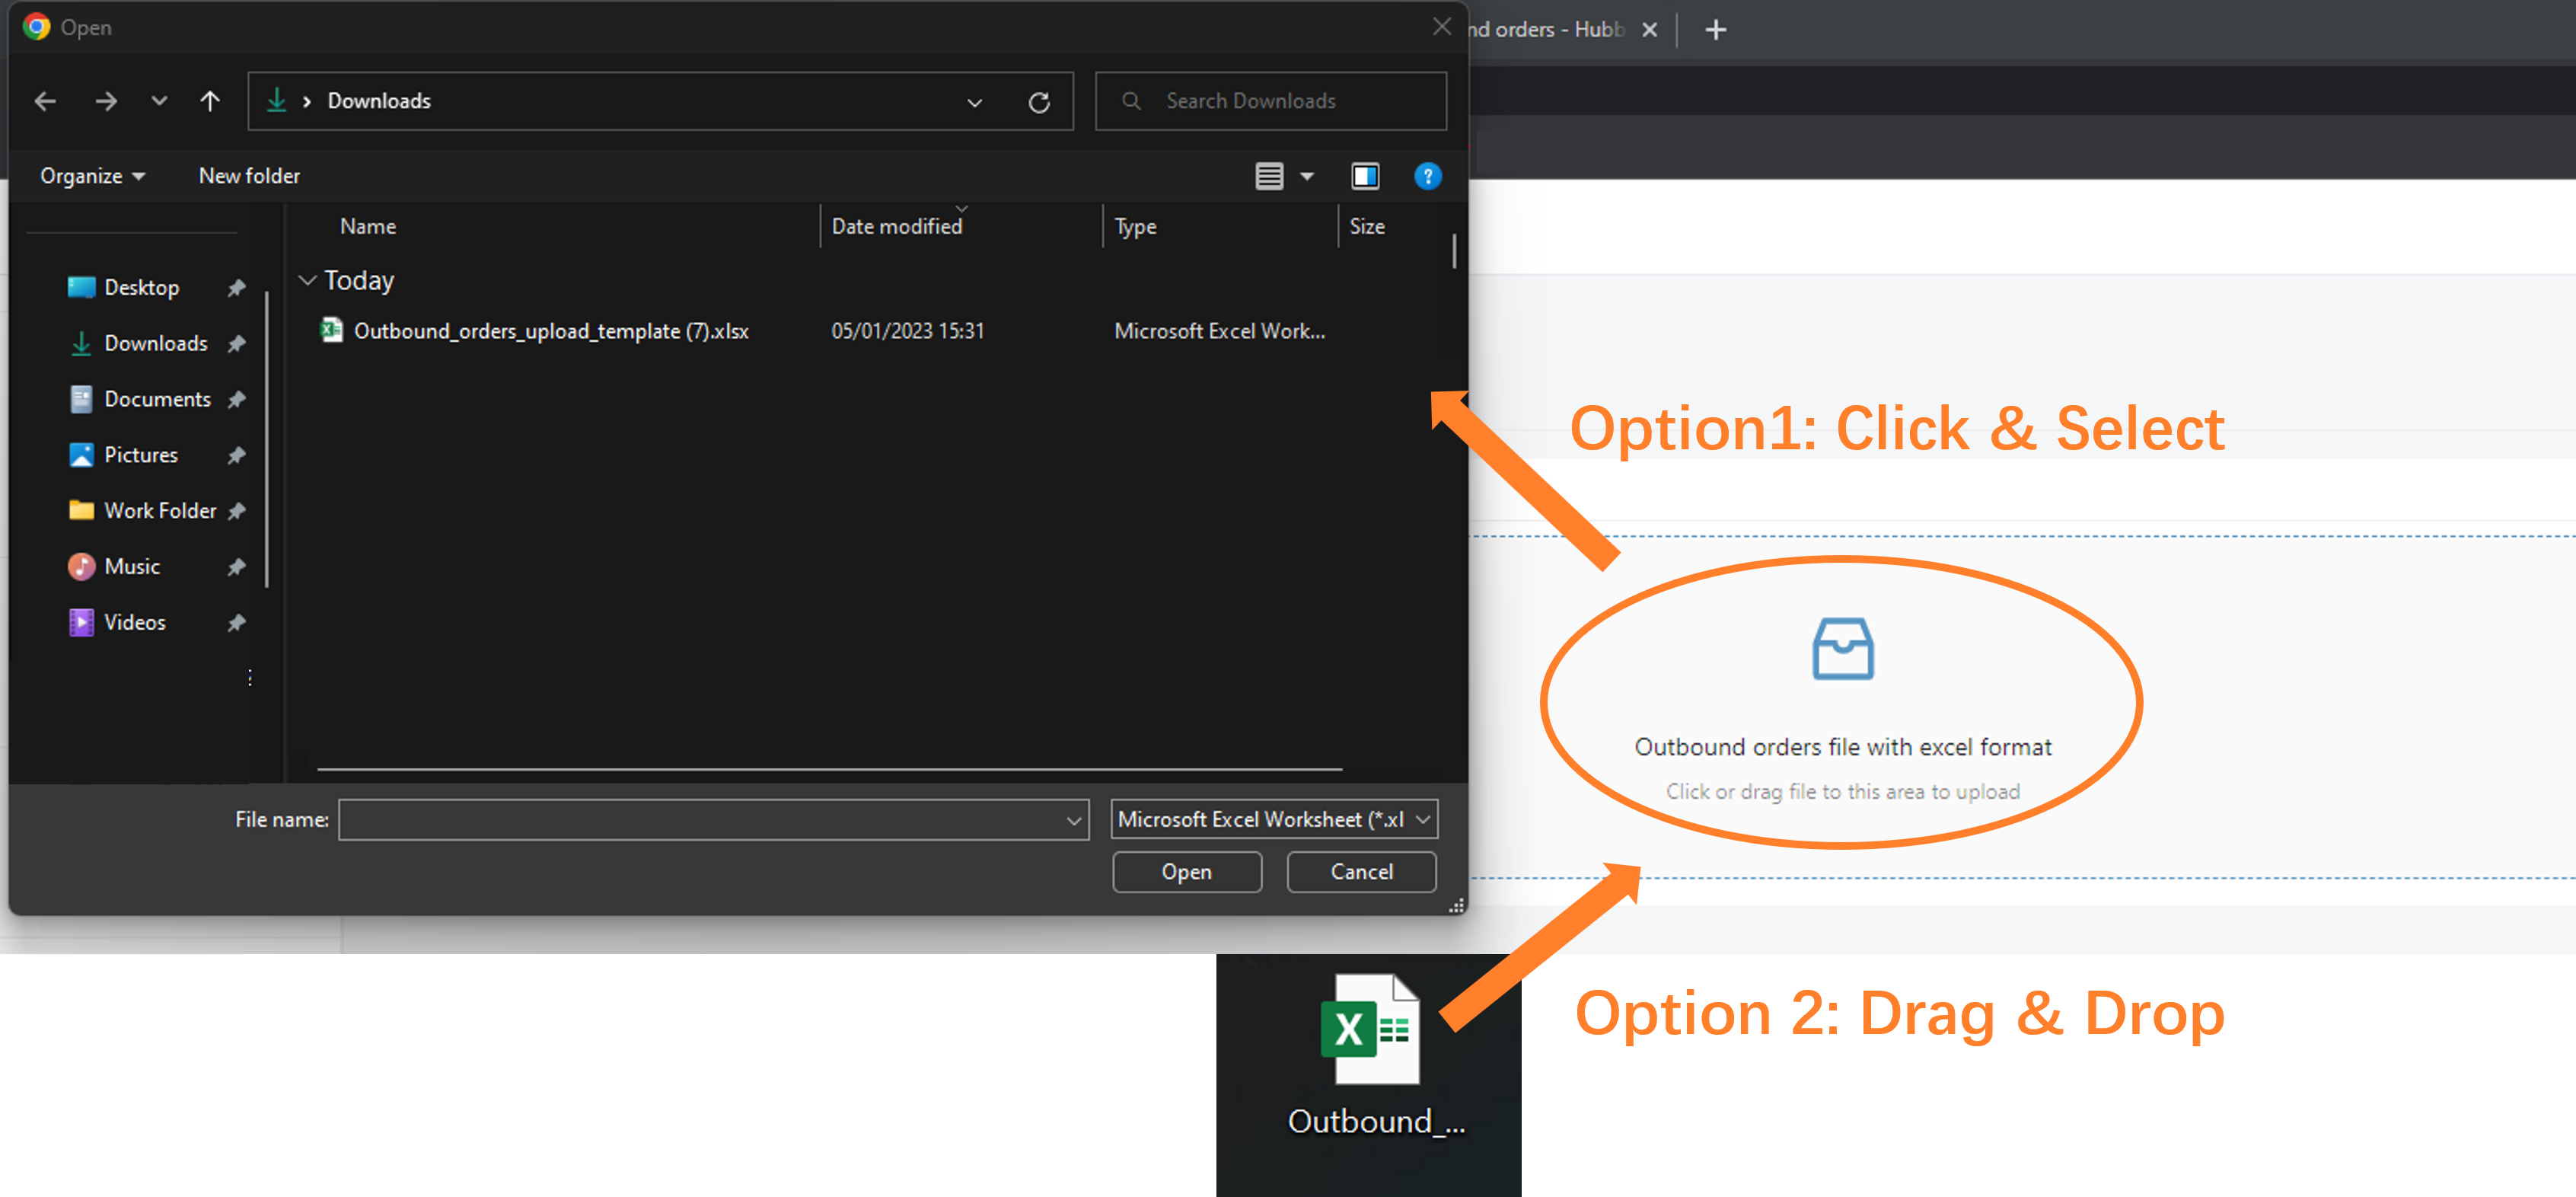
To upload a file in the web UI:
- Click on the upload area and select your file in the file explorer OR
- Drag and drop the file in the upload zone
Review data before import
Upload list
Once the file is successfully uploaded, data to be uploaded are listed in tab To be processed:

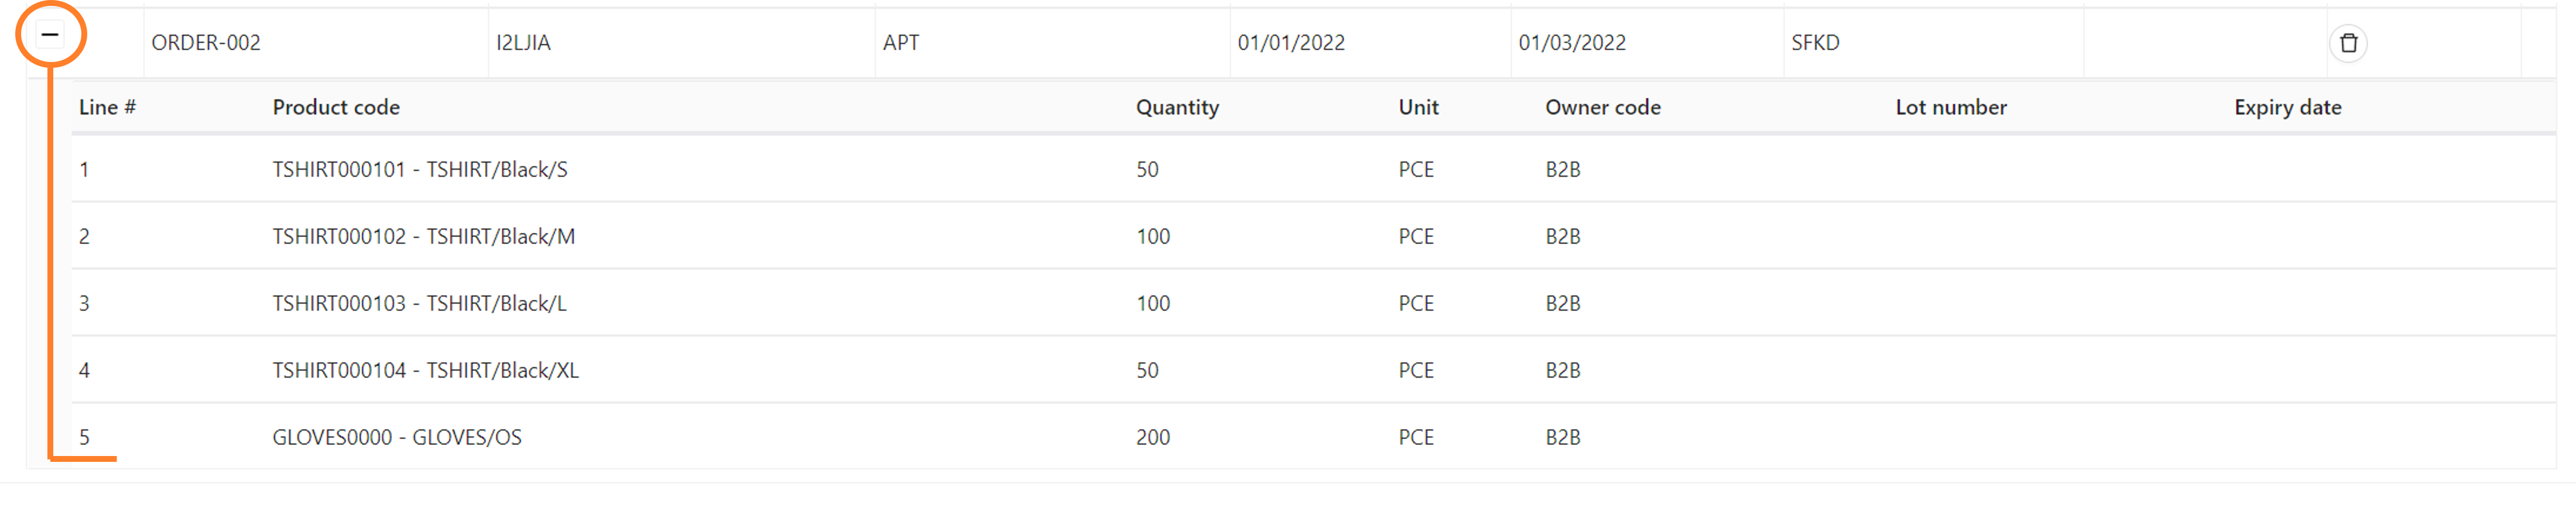
If the data has several levels, the count represents the number of data to be uploaded and details can be viewed by clicking on the + icon. For example, for orders, one data line will corresponds to an order header, and clicking on + will help to see order lines:
Validations
2 types of validation are performed before upload:
- check mandatory fields are not provided as blank
- check against master data
In case of validation error, an error icon will be displayed close to the value, and a warning will be displayed for any row with issues. Hovering the icon with the cursor can give more details on the error. A total count of warnings appear on the top of the screen.
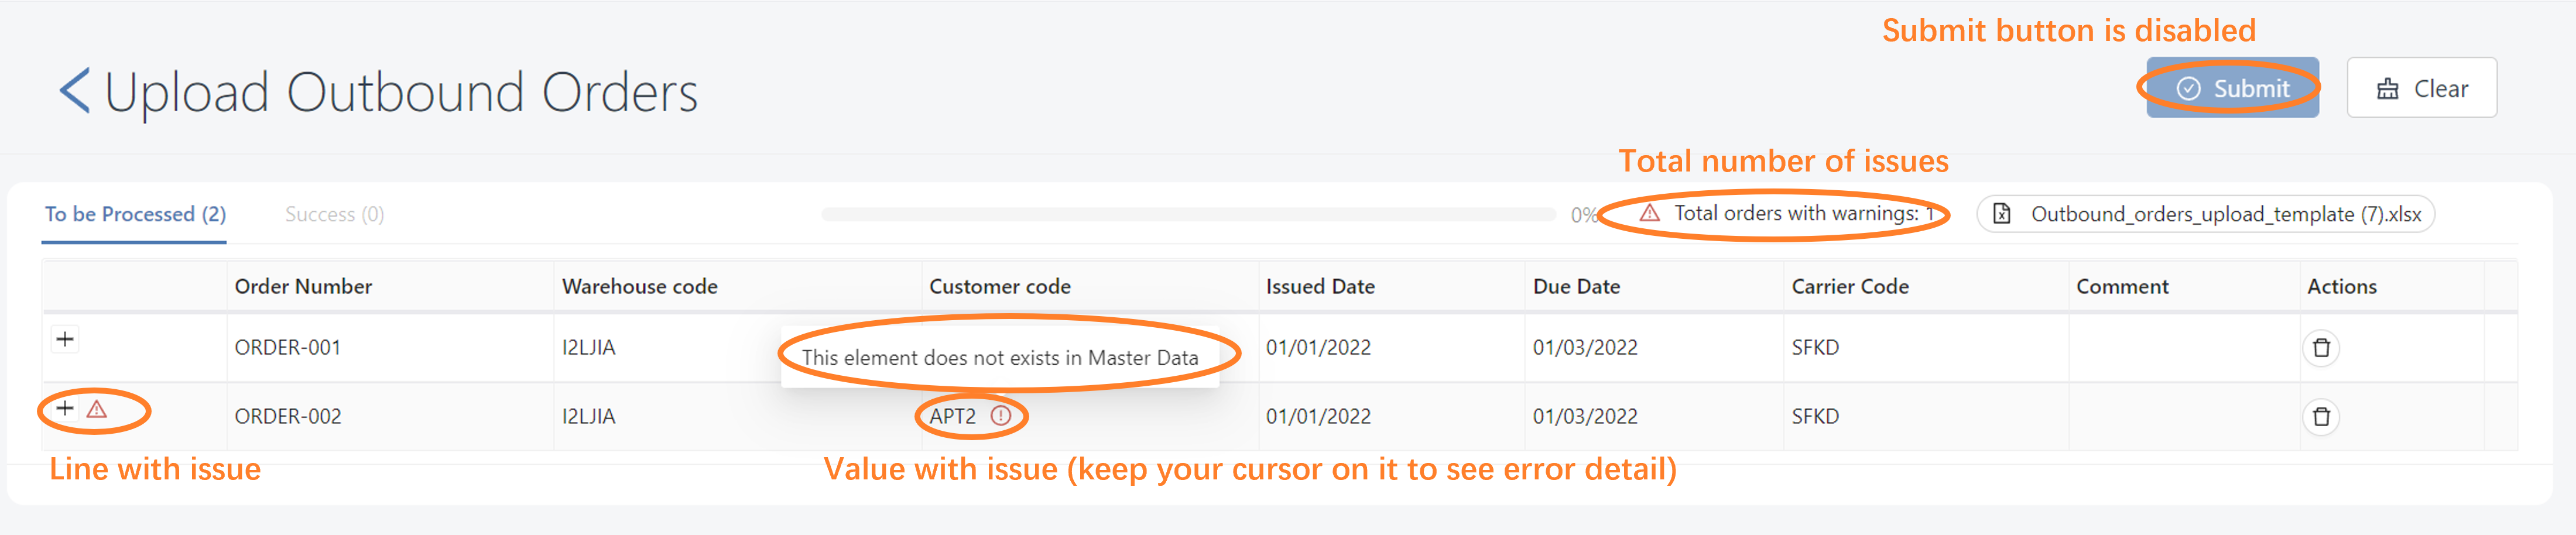
The Upload button is not available until all validation errors has been resolved.
Check against master data is configurable: for some data, it is possible to create master data on-the-fly when uploading. For example, it is possible to create customer data when uploading outbound order.
Editing
It is possible to edit the data before import by clicking on a row. All fields (header and lines) become editable. Warning fields will automatically disappear if the validation becomes successful.

Import and results
Submit
Click Submit button in the top-right corner:
During processing, a progress bar appear on the top of the table. Once all data have been processed, the bar appears as completed (green).

Results
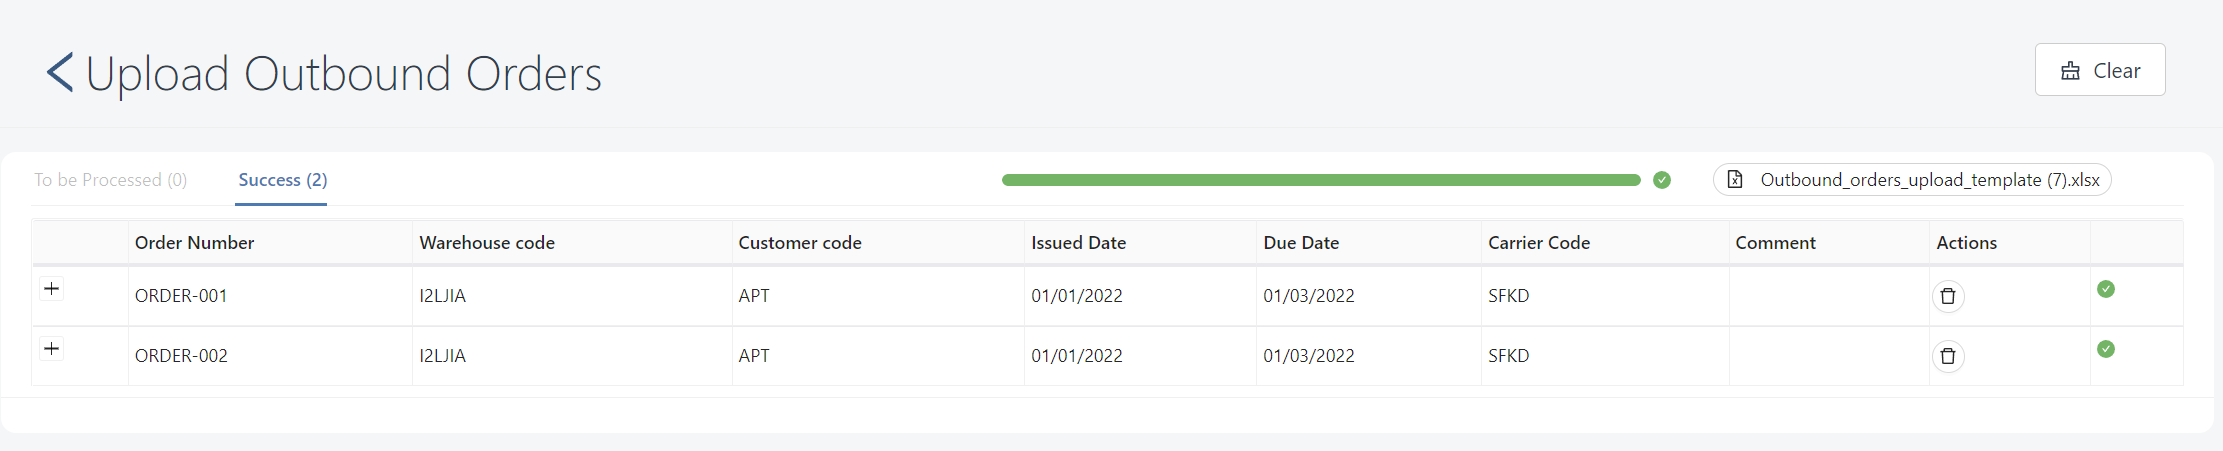
Successfully imported data can be viewed in tab Success:
If the data is rejected, the row will kept displayed in tab To be processed, with an error icon . Hovering the icon can help to understand the error. If the error is technical , please retry (see Reprocessing) or contact your system administrator.

Reprocessing
It is possible to reprocess rejected data (whatever it has been modified or not) by clinking the Submit button again.
Retention and clearing
The data will be kept in memory until the end of your session. If you navigate to another screen, the uploaded data and its results will be displayed when you come back to the upload screen.
If you wish to clear the data, click on the Clear button. in the top-right corner.